however, in some instances, you don't want the suddenness of the change in bang bang control from suddenly being on to suddenly being off. Instead you might want some smoother changes.
Enter proportional control. In this situation, the amount of action is directly dependent on the amount error, which is the difference between the ideal situation, and the actual difference. The error determines how much change you actually need.
Example 1:
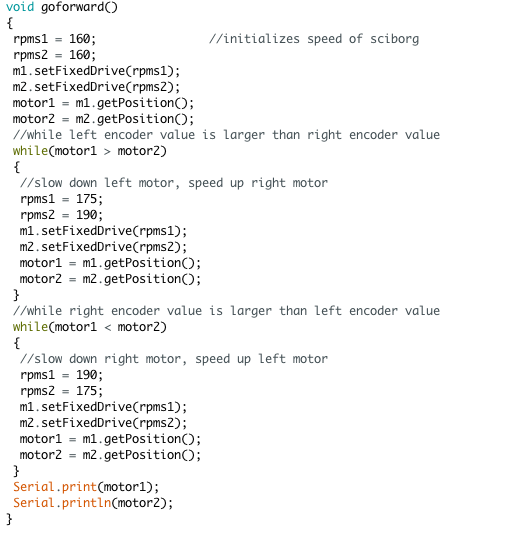
Our first attempt at proportional control was to get our Sciborg to go straighter.
This proportional control works by using the difference between the left and right motor encoder values, which indicates the amount of deviation from a straight line, to correct the difference in motor speeds.
For example, if the left motor was ahead of the right motor, then we should feed more power and speed to the right motor and less to the left motor, and vice versa.
#include <Encoder.h>
#include <PID_v1.h>
#include <BricktronicsMotor.h>
// Select the motor port (MOTOR_1 or MOTOR_2) in the constructor below.
//
#include <Wire.h>
#include <Adafruit_MCP23017.h>
#include <BricktronicsShield.h>
BricktronicsMotor m1(BricktronicsShield::MOTOR_1);
BricktronicsMotor m2(BricktronicsShield::MOTOR_2);
unsigned long previousMillis = 0; // will store last time motor reversed direction
int rpms1 = 255; //speed of motor (range is 0-225)
int rpms2 = 255;
int32_t left;
int32_t right;
int32_t error;
int k = 4;
void setup() {
// Be sure to set your serial console to 115200 baud
Serial.begin(115200);
BricktronicsShield::begin();
// Initialize the motor connections
m1.begin();
}
void loop() {
// put your main code here, to run repeatedly:
goforward();
}
void goforward()
{
rpms1 = 160; //initializes speed of sciborg
rpms2 = 160;
m1.setFixedDrive(rpms1);
m2.setFixedDrive(rpms2);
left = m1.getPosition();
right = m2.getPosition();
error = right - left;
if (left != right) //while left encoder value is larger than right encoder value = too right
{
rpms1 = 160 + error*k; //slow down left motor, speed up right motor
rpms2 = 160 - error*k;
m1.setFixedDrive(rpms1);
m2.setFixedDrive(rpms2);
left = m1.getPosition();
right = m2.getPosition();
}
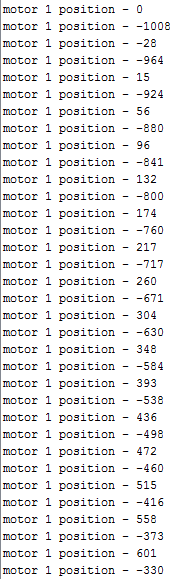
Serial.print(" - leftm: ");
Serial.println(left);
Serial.print(rpms1);
Serial.print(" - rightm: ");
Serial.println(right);
Serial.print(rpms2);
}
This was quite successful.
It went much straighter than trying to fidget with different motor speeds to compensate for the different motor powers.
We did it on the lab floor and it went very straight.
Going on the carpet it also went pretty straight.
Going up and down the ramps were also pretty straight.
Example 2:
Our second go at proportional control was to get our Sciborg to travel exactly 10 feet using the encoder values. In this situation, we took the average of the left and right encoder values and that would tell us how far the sciborg had already traveled. If we knew how much we had left to move, which is the total distance to be driven minus the distance already driven then we could calculate the speed at which the sciborg ought to move. The more distance that was left to travel, the faster the sciborg should move. The gain in this case was 0.015.
code for going 10 feet using encoder values
#include <Encoder.h>
#include <PID_v1.h>
#include <BricktronicsMotor.h>
// Select the motor port (MOTOR_1 or MOTOR_2) in the constructor below.
//
#include <Wire.h>
#include <Adafruit_MCP23017.h>
#include <BricktronicsShield.h>
BricktronicsMotor m1(BricktronicsShield::MOTOR_1);
BricktronicsMotor m2(BricktronicsShield::MOTOR_2);
unsigned long previousMillis = 0; // will store last time motor reversed direction
float rpms1 = 255; //speed of motor (range is 0-225)
float rpms2 = 255;
int32_t left;
int32_t right;
float error;
float k = 4;
float DISTTOGO = 14500;
float distk = .015;
float avg;
float remain_dist;
void setup() {
// Be sure to set your serial console to 115200 baud
Serial.begin(115200);
BricktronicsShield::begin();
// Initialize the motor connections
m1.begin();
m2.begin();
}
void loop() {
// put your main code here, to run repeatedly:
goforward();
while ( left > DISTTOGO){
rpms1 = 0;
rpms2 = 0;
m1.setFixedDrive(rpms1);
m2.setFixedDrive(rpms2);
}
void goforward()
{
left = m1.getPosition();
right = m2.getPosition();
avg = (left + right )/2; // distance traveled already
error = right - left;
remain_dist = DISTTOGO - avg;
if (remain_dist*distk+75 > 160) {
rpms1 = 160;
rpms2 = 160;
}
else {
rpms1 = remain_dist*distk + 75; //initializes speed of sciborg
rpms2 = (remain_dist*distk + 75);
}
m1.setFixedDrive(rpms1);
m2.setFixedDrive(rpms2);
Serial.print(" - leftm: ");
//Serial.println(left);
Serial.println(rpms1);
Serial.print(" - rightm: ");
//Serial.println(right);
Serial.println(rpms2);
}

When testing the Sciborg on carpet and up the ramp, it didn't go the full distance.
It only reached about 9 feet of carpet.
It didn't have enough power to push to 10 feet on the carpet.
Similarly going up the ramp was challenging for the motors as the set minimum motor speed that would effect a movement on flat hard surface was too low for going up the ramp, and so, the sciborg stopped early.
When we tested it going down the ramp we saw that the sciborg traveled faster down the ramp then it had done on the flat surface because gravity was now helping to pull it along its intended direction of travel.
Part 3
The third attempt relating to proportional control was to get the sciborg to follow something using ultrasound, except how fast it was going would be dependent on how far away it was from what was in front of it.
Interestingly, the proportional approach was the first approach that I had thought of, when in thought
It is like the going 10 feet but rather than distance left to travel being the difference between a fixed 10 feet and distance already traveled the distance left to travel is simply the distance that is read by the ultrasound reader. The farther the distance the faster the sciborg should travel until it reaches 11 cm away from what it in front of it.
#include <BricktronicsMotor.h>
#include <BricktronicsShield.h>
BricktronicsMotor m1(BricktronicsShield::MOTOR_1);
BricktronicsMotor m2(BricktronicsShield::MOTOR_2);
const int ultrasonicPin = A0; // declare the input pin for the potentiometer
float rpms1 = 255;
float rpms2 = 255;
float A = 205/62;
float k = 435/62;
float k1 = 435/62;
int dist;
void setup() {
Serial.begin(9600);
BricktronicsShield::begin();
// Initialize the motor connections
m1.begin();
m2.begin();
}
void loop() {
int value = analogRead(ultrasonicPin);
Serial.print("Ultrasonic Reading = ");
Serial.println(value);
dist = value;
rpms1 = dist*A + k;
rpms2 = dist*A + k;
m1.setFixedDrive(rpms1);
m2.setFixedDrive(rpms2);
Serial.print("left rpmps = ");
Serial.println(rpms1);
Serial.print("right rpmps = ");
Serial.println(rpms2);
delay(10);
}
This is the result:
it worked pretty well. it didn't go straight but that was because we didn't code to go straight, and even though we set the RPMS to be the same for both motors, it still ended up going crooked.
This video does demonstrate that it does follow and it does follow.
Part 4:
Finally we had to get our Sciborg to follow a line:
the way we got our sciborg to follow a line was was to get it to follow the boundary of light and dark. We set the light-dark boundary to be 85. The idea is that if the light value is too light, then it is to the left of the light-dark boundary and it should turn right, and if the light value is too dark, then it is right of the light-dark boundary and it should turn left. How much it needs to turn is determined by how much the read in light value deviates from the light value at the light dark boundary which we set to 85.
Here is the code:
#include <Encoder.h>
#include <PID_v1.h>
#include <BricktronicsMotor.h>
// Select the motor port (MOTOR_1 or MOTOR_2) in the constructor below.
//
#include <Wire.h>
#include <Adafruit_MCP23017.h>
#include <BricktronicsShield.h>
#include <BricktronicsLight.h>
BricktronicsMotor m1(BricktronicsShield::MOTOR_1);
BricktronicsMotor m2(BricktronicsShield::MOTOR_2);
BricktronicsLight ls(BricktronicsShield::SENSOR_2);
unsigned long previousMillis = 0; // will store last time motor reversed direction
int rpms1 = 255; //speed of motor (range is 0-225)
int rpms2 = 255;
int32_t motor1;
int32_t motor2;
int light;
float k =3;
void setup() {
// Be sure to set your serial console to 115200 baud
Serial.begin(115200);
BricktronicsShield::begin();
// Initialize the motor connections
m1.begin();
m2.begin();
// Initialize the light sensor connections
ls.begin();
}
void loop() {
// put your main code here, to run repeatedly:
// if see white underneath then continue
light = ls.scaledValue() - 85;
Serial.print("Value :");
Serial.println(ls.scaledValue());
rpms1 = 160-k*light;
rpms2 = 170+k*light;
if (rpms1 < 100) {
rpms1 = 100;
}
if (rpms2 < 105) {
rpms2 = 105;
}
Serial.print("Left rpms");
Serial.println(rpms1);
Serial.print("Value");
Serial.println(rpms2);
m1.setFixedDrive(rpms1);
m2.setFixedDrive(rpms2);
delay(2);
}
and this is my code running correctly.

Actually, because I failed to communicate the working version to my partner, my partner came up with her own version of this using a different light dark boundary that worked even better - 88 instead of 85.